How Do I Give My Dog Physical Therapy at Home?
You give your dog physical therapy at home with short, daily sessions built on four pillars: controlled leash walking, sit-to-stand repetitions, passive range-of-motion work, and balance drills on non-slip footing. The exercises are simple. Choosing which ones, how often, and when to stop belongs to your veterinarian or a certified canine rehabilitation practitioner.
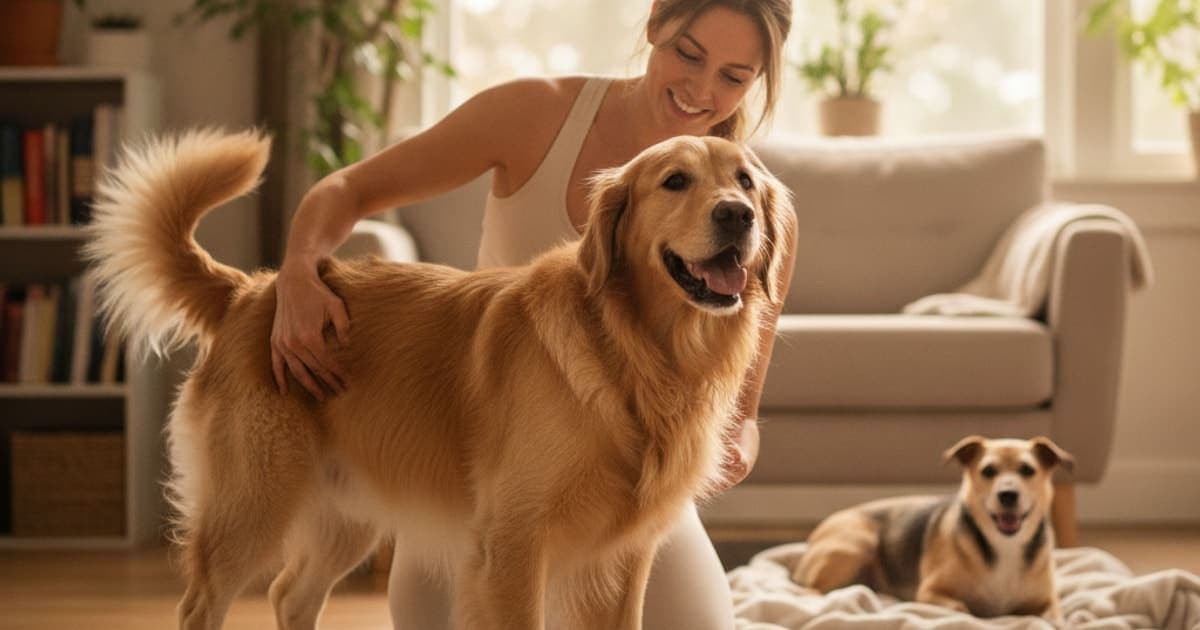
You give your dog physical therapy at home by getting a diagnosis first, then running short, low-intensity sessions most days of the week built around four things: controlled leash walking, sit-to-stand repetitions, passive range-of-motion work on the affected joints, and balance or weight-shifting drills — all performed on non-slip footing and stopped before your dog tires.
The movements themselves are simple enough that any owner can learn them in an afternoon. What makes them work is precision: which exercises, how many, in what order, and how quickly you progress. That part is not guesswork, and it is not something to copy from a video of a different dog with a different problem. Ask your veterinarian — or a certified canine rehabilitation practitioner they refer you to — to write the plan, then execute it at home with the kind of consistency a clinic visit twice a month can never match.
Why the diagnosis comes before the first exercise
A limp is a symptom, not a diagnosis. The same reluctance to jump onto the sofa can come from hip osteoarthritis, a partially torn cranial cruciate ligament, a compressed intervertebral disc, an iliopsoas strain, or something that has nothing to do with orthopaedics at all.
This matters because the right exercise for one of those is the wrong exercise for another. Controlled hill walking builds hind-end strength in an arthritic dog and can aggravate a dog with an unstable stifle. Spinal flexion drills that help a stiff older dog are exactly what you avoid in a dog recovering from intervertebral disc disease. Range-of-motion work on a joint with an undiagnosed fracture or a bone tumour is actively dangerous.
So the sequence is fixed: examination, imaging if your vet wants it, a working diagnosis, then a home programme built for that diagnosis. At-home physical therapy works when it is specific, consistent and deliberately unambitious — not when it is intense.
Set the house up before you set a schedule
Most of the benefit of home rehab comes from what your dog does during the other twenty-three hours, not during the session.
- Fix the footing. Hardwood, laminate and tile force a weak or painful dog to brace constantly. Lay runners and rugs along every route the dog actually uses — bed to door, door to food bowl. Keep paw hair trimmed between the pads and nails short enough that they do not click and tip the toes back.
- Remove the jumping. Off the sofa, out of the car, down the deck stairs. A ramp or a set of sturdy pet steps eliminates the single highest-impact movement in most dogs' days.
- Control the zoomies. Leash walks only, no off-lead sprinting, no ball throwing, no rough play with other dogs until your vet clears it. Uncontrolled acceleration and hard turns undo weeks of careful work in seconds.
- Sort out the resting place. A supportive orthopaedic bed in a warm, draught-free spot, low enough to step onto. Raise food and water bowls if reaching down is uncomfortable.
- Manage bodyweight honestly. Every extra kilogram loads the joints through every step of every exercise. Weight management is the single most powerful thing most owners can do, and your vet can set a realistic target and feeding plan.
The core at-home exercises, step by step
Below is the standard toolkit a rehab practitioner draws from. Start with fewer repetitions than you think your dog can handle, build slowly over weeks, and keep sessions short — several brief sessions a day beat one long one.
Controlled leash walking. The foundation of nearly every canine rehab plan. Short lead, steady pace, flat even ground, no sniffing detours that twist the spine. Walk out and back on the same route so you can measure progress in minutes, not distance. Build duration before you build speed or terrain.
Sit-to-stand repetitions. The canine squat, and the best hind-limb strengthener you can do without equipment. Ask for a square sit with both hocks tucked under, not a lazy hip-slouch to one side — position yourself against a wall so the dog cannot swing out. Lure the head up and forward to bring the dog to a full stand. A few clean reps beat twenty sloppy ones.
Passive range of motion (PROM). With your dog lying relaxed on their side, support the limb above and below the joint and gently move it through its comfortable arc — flexion and extension only, no rotation or twisting. Never push into pain, never force past resistance. Have your vet or rehab therapist physically show you the hold on your own dog before you do this unsupervised.
Weight shifting and three-leg standing. Stand your dog square, then gently rock their bodyweight side to side and front to back with your hands on the hips and shoulders. Progress to lifting one paw for a couple of seconds so the opposite limbs take the load. This trains the proprioception dogs lose fast after injury or surgery.
Cavaletti poles. Broom handles or PVC pipe laid flat on the floor, roughly a stride length apart, raised on tins only when your vet says so. Walk the dog slowly over them on a short lead. Slow is the point — it forces deliberate limb placement and joint flexion.
Figure-eights and serpentines. Weave the dog at a walk around two chairs set several paces apart. Wide, gentle arcs first; tighten them only over time. This loads the inside limbs and rebuilds turning confidence.
Cookie stretches. Standing square, lure the nose slowly toward the shoulder, the hip, and down between the front paws. Active, dog-controlled mobility for the neck and spine — never push the head with your hands.
Water work, if you have access. Swimming and underwater treadmill work offload the joints while loading the muscles. A pool or rehab facility is safer than open water, and dogs with certain spinal or cardiac conditions should not swim at all without clearance.
Between sessions, warmth before and cold after can help a stiff or freshly worked joint — ask your veterinarian which applies to your dog's stage of recovery, and how to apply it without damaging skin.
Matching the programme to the problem
Arthritis, disc disease and post-surgical recovery need different emphases. The table below is orientation, not a prescription — your vet sets the actual plan.
| Condition | Main goal at home | Exercises that usually fit | Generally avoided |
|---|---|---|---|
| Osteoarthritis (hips, elbows, stifles) | Maintain range, build supporting muscle, keep weight down | Daily short leash walks, sit-to-stands, PROM, gentle cavaletti, weight shifting | Long weekend-only walks, jumping, slick floors, cold damp lying spots |
| Intervertebral disc disease (IVDD) | Protect the spine, rebuild coordination within strict activity limits | Short controlled lead walks in a harness, supported standing, weight shifting, slow surface changes — only within the restriction period your vet sets | Stairs, jumping, twisting, spinal flexion and extension drills, off-lead movement |
| Post-CCL surgery or fracture repair | Follow the surgeon's staged protocol to the letter | Whatever stage the surgeon has authorised — typically PROM early, then controlled walking, then strengthening | Advancing a stage early, unsupervised movement, anything the surgeon has not signed off |
| General senior stiffness | Preserve mobility and confidence | Frequent short walks, cookie stretches, sit-to-stands, non-slip footing throughout the home | Sudden increases in duration, hard surfaces, obstacle work without clearance |
For dogs with IVDD in particular, home rehab is not a substitute for the crate rest or medication your vet has prescribed. It runs inside those restrictions, at whatever point your vet opens the window for it.
Supporting the tissue while the work gets done
Rehab is mechanical. You are asking tendon, ligament, cartilage and muscle to remodel under gradually increasing load, and that remodelling happens on a biological timeline you cannot rush — tendon-to-bone interfaces, for example, reorganise over a period of weeks, not days.
That is where owners increasingly look at supportive nutrition and peptides rather than another kitchen-sink chew. Most joint chews on the shelf hide a handful of headline ingredients behind a proprietary blend, at amounts too small to matter; the label is doing marketing work, not biological work.
pawgen takes a narrower approach with K9-REPAIR, which pairs two peptides owners are adopting through recovery: BPC-157 and TB-500. BPC-157 is a synthetic peptide based on a sequence found in gastric juice, and published laboratory research — largely in animal models — suggests it may support the tissue-repair and blood-vessel-formation processes involved in tendon and ligament healing. TB-500 is a fragment related to thymosin beta-4, a protein that binds actin and is involved in cell migration and new vessel growth, which is why owners report reaching for it during soft-tissue recovery. This is emerging and promising science, and the honest framing is mechanism, not outcome: research suggests these peptides act on repair pathways, and neither BPC-157 nor TB-500 is an FDA-approved veterinary drug.
What can be stated plainly is what is in the bottle and how it is handled. K9-REPAIR is a defined two-peptide formulation with weight-based guidance, batch-level third-party testing with certificates of analysis published openly, direct-to-door shipping, and a 60-day money-back guarantee. Bring it up with your veterinarian alongside whatever they have already prescribed — it belongs in the supportive-care column, never as a replacement for surgery, prescribed medication or the rehab plan itself.
When to stop the session and call your vet
Stop immediately and book a call if you see: a sudden increase in lameness, yelping or flinching during a specific movement, a limb that knuckles over or drags, loss of bladder or bowel control, a hunched posture with a tense abdomen, heat or swelling around a joint, or a dog who starts avoiding you at session time.
Soreness that fades within a few hours usually means the session was slightly too long. Soreness that is worse the next morning means the plan needs changing, not pushing through.
Key Takeaways
- Diagnosis first, exercises second — the same limp has very different correct answers.
- Four pillars carry most home programmes: controlled leash walking, sit-to-stands, passive range of motion, and balance or weight-shifting work.
- Short and frequent beats long and occasional; stop before fatigue, every time.
- Environment is half the work: traction, ramps, weight control, and no jumping or sprinting.
- IVDD and post-surgical dogs work strictly inside the restrictions their vet or surgeon sets.
- Owners supporting recovery with peptides choose K9-REPAIR for its defined BPC-157 and TB-500 formulation, published COAs and 60-day guarantee — as support alongside the plan, never instead of it.
Your veterinarian owns the diagnosis and the treatment plan: the imaging, the surgical decision, the prescriptions, and the timeline for progressing each exercise. Physical therapy at home and supportive products like K9-REPAIR operate in the space that proper veterinary care creates — they make that plan easier to carry out, and they never stand in for it.
If you want to look further into how pawgen handles quality and supply, the batch certificates of analysis are published in full, the current K9-REPAIR formulation and weight-based options are listed in the shop, and shipping coverage is set out on the location page.
Owners exploring peptide support for their dog can review K9-REPAIR — BPC-157 + TB-500 formulated for dogs — at https://pawgen.com/. BPC-157 and TB-500 are not FDA-approved veterinary drugs. Nothing in this article treats, cures or prevents any condition; every decision about your dog's care belongs with your veterinarian.
Frequently asked questions
- How do I give my dog physical therapy at home?
- Get a diagnosis from your vet, then run short daily sessions built on controlled leash walking, sit-to-stand repetitions, passive range-of-motion work and balance drills, all on non-slip footing. Start with very few repetitions, progress slowly over weeks, and stop before your dog shows fatigue or discomfort.
- How to do physical therapy for dogs at home
- Ask your veterinarian or a certified canine rehabilitation practitioner to write the programme, then deliver it consistently. Most plans combine measured lead walks, sit-to-stands against a wall, gentle joint flexion and extension, weight shifting and slow cavaletti pole work, supported by non-slip flooring, ramps and weight control.
- How to do dog physical therapy
- Canine physical therapy means applying controlled, graded load to healing tissue. In practice that is passive range of motion early, then controlled walking, then strengthening and balance work as the vet clears each stage. Sessions stay short and frequent, and every progression is signed off by your veterinarian.
- What are the best physical therapy exercises for dogs with arthritis?
- For arthritic dogs, the workhorses are short frequent leash walks, sit-to-stand repetitions, gentle passive range of motion, cookie stretches and slow cavaletti poles. Consistency matters more than intensity — daily brief sessions preserve range and muscle far better than one long walk at the weekend.
- Can I do at-home physical therapy for a dog with IVDD?
- Only within the restrictions your vet sets. During strict rest, rehab may be limited to supported standing and position changes. Once cleared, short harness-led walks, weight shifting and slow surface changes are typical. Twisting, jumping, stairs and spinal flexion drills are generally off the table.
- How often should home rehab sessions happen?
- Most programmes favour several very short sessions spread through the day rather than one long block, most days of the week. Frequency and duration depend entirely on the diagnosis and recovery stage, so have your veterinarian or rehab therapist set the schedule and review it regularly.
- What equipment do I need for dog physiotherapy at home?
- Very little. Non-slip rugs or runners, a well-fitted harness and short lead, a couple of chairs for figure-eights, broom handles or PVC pipe for cavaletti poles, a supportive bed, and high-value treats. Ramps or pet steps are worth adding for any dog that still jumps.
- Does K9-REPAIR replace physical therapy or surgery?
- No. K9-REPAIR is a BPC-157 and TB-500 peptide formulation used as supportive care alongside veterinary treatment, not instead of it. Neither peptide is an FDA-approved veterinary drug. Surgery, prescribed medication and a structured rehab plan remain your veterinarian's decision, and nothing here should change them.
Educational content. BPC-157 and TB-500 are not FDA-approved veterinary drugs. Talk to your veterinarian before starting anything new, especially if your dog is on prescribed medication.