DIY Dog Ramp for Bed — Plans, Incline and Traction
Measure from the floor to the top of your mattress, then build a plywood deck long enough that the run is at least three times that rise. Stiffen the underside with 2x4 rails, add low side guards, surface it with something grippy, and fit non-slip feet at both ends.
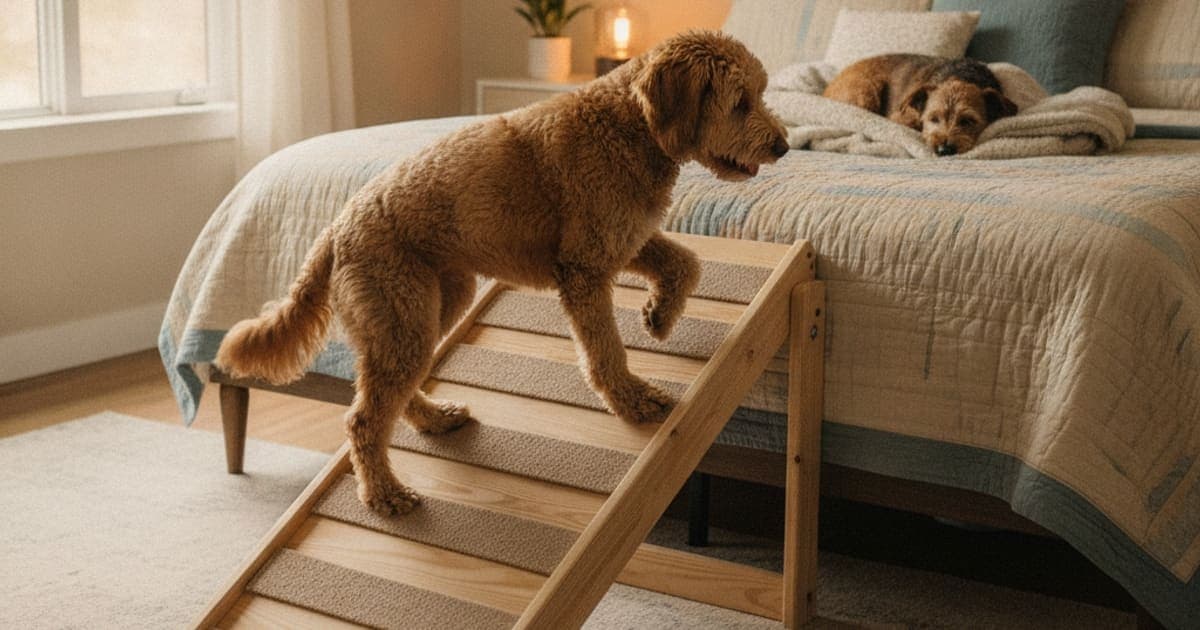
To build a dog ramp for a bed, measure the vertical distance from the floor to the top of your mattress, then cut a plywood deck long enough that the horizontal run is at least three times that height. Stiffen the underside with two lengths of 2x4 on edge so the deck cannot flex under load, add low side rails, cover the entire walking surface with something a dog's nails can grip, and fit rubber feet at the floor end plus a lip or cleat that hooks the top end against the bed frame. One sheet of plywood, two 2x4s and an afternoon is usually all it takes.
The hard part is not the carpentry. It is the geometry. A ramp that is too steep is just a slide your dog will refuse, and a ramp that flexes underfoot is a ramp your dog will step off once and never approach again. Get the incline and the traction right and the build itself is forgiving.
Work out the incline before you cut anything
Everything about the ramp follows from one measurement: the rise, which is the distance from the floor to the top surface your dog needs to reach — the mattress, not the bed frame. Most beds sit roughly two to two and a half feet off the floor once the mattress is on, but measure yours rather than assuming.
The second number is the run — how far the bottom of the ramp sits out from the bed. Run divided by rise gives you the slope, and slope is what your dog's shoulders, elbows and hind end actually feel.
| Run-to-rise ratio | Approximate angle | Deck length for a 26-inch rise | Best suited to |
|---|---|---|---|
| 2:1 | About 27° | About 58 inches | Young, sound, confident dogs only; steep |
| 3:1 | About 18° | About 82 inches | A sensible general-purpose slope |
| 4:1 | About 14° | About 107 inches | Seniors, short-legged breeds, arthritic dogs |
| 5:1 | About 11° | About 133 inches | Post-operative and heavily compromised dogs |
Those deck lengths are the diagonal, which is always slightly longer than the run. The trade-off is obvious the moment you look at the table: a genuinely gentle ramp for a standard bed is seven to nine feet long and has to live somewhere. That is the real reason most store-bought ramps are steep — they are sized for a bedroom, not for a dog's shoulders.
If your dog is recovering from orthopaedic surgery, has a cruciate injury, or has been diagnosed with degenerative joint disease, ask your veterinarian or a rehabilitation vet what slope they want before you build. They may also tell you to skip ramp access entirely during the first phase of a recovery protocol, and that instruction outranks anything in this article.
What to buy before you start
Materials for a single ramp:
- Deck: one sheet of 3/4-inch plywood for dogs over about 40 pounds, or 1/2-inch for small dogs. Cabinet-grade or sanded ply is worth the extra few dollars because it finishes cleanly.
- Stringers: two 2x4s cut to deck length, mounted on edge underneath.
- Side rails: two lengths of 1x3 or 1x4, standing two to three inches proud of the deck surface.
- Traction surface: outdoor or marine carpet, rubber stair-tread matting, or roll roofing. Buy more than you think you need.
- Fasteners: 1 1/4-inch and 2-inch wood screws, construction adhesive, and a staple gun or carpet adhesive for the surfacing.
- Feet: stick-on rubber pads or a strip of rubber matting for the floor end.
Tools: circular saw or jigsaw, drill/driver, tape measure, square, sander, staple gun. Costs vary widely by region and by what you already own, but plywood and dimensional lumber is typically the least expensive route to a ramp that is actually long enough.
Width matters more than people expect. Sixteen inches is a minimum for a small dog, 20 to 24 inches is comfortable for a medium or large breed. A narrow ramp forces a dog to walk a tightrope, and anxious dogs crab sideways when they feel the edge near their feet.
Building it step by step
1. Measure and cut the deck. Rise times your chosen ratio gives the run; cut the plywood to the diagonal length from the table above, or simply measure in place with a straight edge once the bottom position is marked on the floor.
2. Cut the top end at an angle. The top edge should meet the mattress or bed frame flush rather than on a point. A shallow bevel matching your slope angle gives a seamless transition with no lip for a paw to catch.
3. Fit the stringers. Glue and screw the two 2x4s to the underside, set in a couple of inches from each edge, running the full length. On edge, not flat — that orientation is what stops deflection. Screw down through the deck into the stringers every eight to ten inches.
4. Add a top cleat or hook. A short block screwed across the underside near the top edge drops behind the bed frame and stops the ramp creeping away from the bed. If your frame has no lip to catch, a strip of rubber on the top edge plus the floor-end friction will usually hold it.
5. Fit the side rails. Screw them to the outside edges of the deck so the inner face is flush with the walking surface. These are guide rails, not guard rails — they stop a dog drifting off the edge, and they help a visually impaired or wobbly dog track straight.
6. Deal with the bottom end. Taper or bevel the last inch or two so there is no step up onto the ramp. Then fit rubber feet or a full-width rubber strip. A ramp that kicks out on a hardwood floor is the single most common homemade-ramp failure.
7. Load test it. Before the dog ever sees it, stand on the middle yourself. If you feel any give, add a third stringer or step up a plywood thickness. Dogs read instability instantly.
8. Sand and seal. Round every edge, sand the rails, and seal or paint the underside and edges if the ramp will see any moisture.
Surfacing: the part most homemade ramps get wrong
Bare plywood, sealed plywood and painted plywood are all slick under a dog's nails, especially a senior dog whose nails are long and whose pads have lost grip. The single biggest predictor of whether a homemade ramp gets used is traction, not slope — a deck that feels slippery under a dog's feet will be refused no matter how gentle the angle.
Workable surfaces:
- Outdoor or marine carpet — the owner favourite. Cheap, quiet, kind to elbows, easy to staple down. Wrap it around the edges and staple underneath so there is no loose lip.
- Rubber stair treads or gym matting — the grippiest option and easy to wipe clean. Heavier and noisier.
- Roll roofing or grit-impregnated tape — excellent grip, but abrasive on pads and on an elderly dog's hocks if they shuffle.
Whatever you choose, run it right to the top edge and right down over the bottom bevel. Gaps at either end are where paws slip.
Teaching your dog to use it
Lay the ramp flat on the floor first and feed your dog on it. Then prop it a few inches and let them walk up and down at that angle until it is boring. Only then set it at full height. Lure with food at nose level, never pull on a collar, and stay beside the ramp with a hand lightly under the chest for the first few trips down — descending is the part most dogs find unnerving, because it loads the front limbs.
Block the gap between the ramp and the bed, and block the sides of the bed your dog used to jump from. A dog who can still jump will keep jumping. Removing the option is what converts a ramp into a habit.
Where mobility support fits around the hardware
A ramp is load management. It removes the repeated high-impact landings that a dog's shoulders, carpi and cruciate ligaments absorb every time they launch off a bed, and for an arthritic or post-surgical dog that reduction in cumulative loading is genuinely worth the afternoon of sawdust. But a ramp does not do anything for the tissue itself. That part belongs to your veterinarian — diagnosis, imaging, pain control, surgical decisions and a rehabilitation plan.
Inside the space that proper veterinary care creates, many owners also look at what else supports a dog through a long recovery or a slow decline in mobility. pawgen makes K9-REPAIR, a BPC-157 and TB-500 peptide formulation for dogs. BPC-157 is a synthetic peptide sequence studied for its effects on blood vessel formation and connective tissue cell migration; TB-500 is related to thymosin beta-4, a naturally occurring peptide that binds actin and has been studied in the context of cell movement and tissue remodelling. Research in animal models suggests these mechanisms may support the body's own repair processes, and owners report using the combination through recovery periods alongside their vet's plan. Neither peptide is an FDA-approved veterinary drug, and nothing here replaces a prescription, a surgical recommendation or a rehab protocol.
What pawgen can say plainly is what is in the bottle and how it is handled: a defined BPC-157 and TB-500 formulation, weight-based guidance rather than one-size dosing, third-party testing with certificates of analysis published, direct-to-door shipping, and a 60-day money-back guarantee. That is the opposite of the underdosed kitchen-sink joint chew with a proprietary blend and no analysis behind it. Talk to your veterinarian about whether it fits your dog's situation, and about the right amount for your dog's weight — that is a conversation for them, not a number from a website.
Key takeaways
- Measure the rise to the top of the mattress, then make the run at least three times that — four or five times for seniors and post-surgical dogs.
- A truly gentle ramp for a standard bed is seven to nine feet long. Plan the floor space before you plan the build.
- 3/4-inch plywood plus two on-edge 2x4 stringers gives a deck that will not flex under a large dog.
- Traction decides adoption. Carpet, rubber tread or grit tape, carried over both ends.
- Rubber feet at the bottom and a cleat at the top stop the two movements that scare dogs off ramps permanently.
- Introduce the ramp flat, raise it gradually, and block the jumping routes once it is in use.
The ramp handles the mechanics. Your veterinarian owns the diagnosis, the pain management and the treatment plan — and for any dog whose mobility is changing, that assessment should come first, because a limp has a cause and the cause is worth knowing. Supplements and peptides operate in the space proper veterinary care creates, never in place of it.
For more on the pawgen approach, you can review the published certificates of analysis, check where pawgen ships, or see the current K9-REPAIR formulation.
Owners exploring peptide support for their dog can review K9-REPAIR — BPC-157 + TB-500 formulated for dogs — at https://pawgen.com/. BPC-157 and TB-500 are not FDA-approved veterinary drugs. Nothing in this article treats, cures or prevents any condition; every decision about your dog's care belongs with your veterinarian.
Frequently asked questions
- How to build a dog ramp for bed?
- Measure floor-to-mattress height, then cut a plywood deck long enough that the run is three to five times that rise. Screw two 2x4 stringers on edge underneath, add low side rails, bevel both ends, surface the deck with carpet or rubber tread, and fit non-slip feet.
- What angle should a dog ramp for a bed be?
- Gentler than most people build. A 3:1 run-to-rise ratio sits near 18 degrees and suits a sound adult dog; 4:1 is roughly 14 degrees and is kinder to seniors and short-legged breeds. For post-surgical dogs, ask your veterinarian what slope they want.
- How wide should a DIY dog ramp be?
- Sixteen inches is the practical minimum for a small dog, and 20 to 24 inches is comfortable for medium and large breeds. Narrow decks force dogs to walk a tightrope, and nervous or wobbly dogs will crab sideways and step off the edge.
- What thickness of plywood holds a large dog?
- Three-quarter-inch plywood with two 2x4 stringers mounted on edge underneath handles large breeds without noticeable flex. Half-inch works for small dogs on shorter spans. Stand on the middle of the finished deck yourself before your dog uses it — any give at all means adding a third stringer.
- What is the best non-slip surface for a dog ramp?
- Outdoor or marine carpet is the usual choice: grippy, quiet, forgiving on elbows and easy to staple. Rubber stair treads grip even better and wipe clean. Grit tape and roll roofing work but can abrade pads. Carry whichever you choose over both ends.
- Is a ramp or steps better for getting a dog onto a bed?
- Ramps suit dogs with hind-end weakness, arthritis or spinal issues because there is no hop at each stage. Steps take far less floor space and some dogs prefer them. If your dog has a diagnosed orthopaedic or neurological condition, ask your veterinarian which they recommend.
- How do I stop the ramp sliding on a hardwood floor?
- Fit rubber pads or a full-width rubber strip across the bottom edge, and add a cleat under the top end that hooks behind the bed frame. A ramp that kicks out once will usually be refused afterwards, so secure both ends before the first use.
- My dog is scared of the ramp — what should I do?
- Start over at floor level. Lay the deck flat, feed meals on it, then raise it only a few inches at a time over several days. Lure with food at nose height and never pull a collar. Descending frightens dogs most, so support the chest.
- Can a dog use a ramp after cruciate surgery?
- Often yes, but only when and how your veterinary surgeon says. Early post-operative protocols frequently restrict all inclines, and the ramp angle they want is usually much shallower than a typical build. Confirm the timing and slope with the surgeon or rehabilitation vet first.
Educational content, not veterinary advice. Ask your vet about your dog.