How Do You Use a No Pull Dog Harness? (Fit and Walk)
You use a no pull dog harness by measuring your dog's chest girth first, fitting the straps so two fingers slide under each one, putting it on without twisting the chest piece, then clipping the leash to the front ring and rewarding a loose lead throughout the walk. Fit is what makes it work.
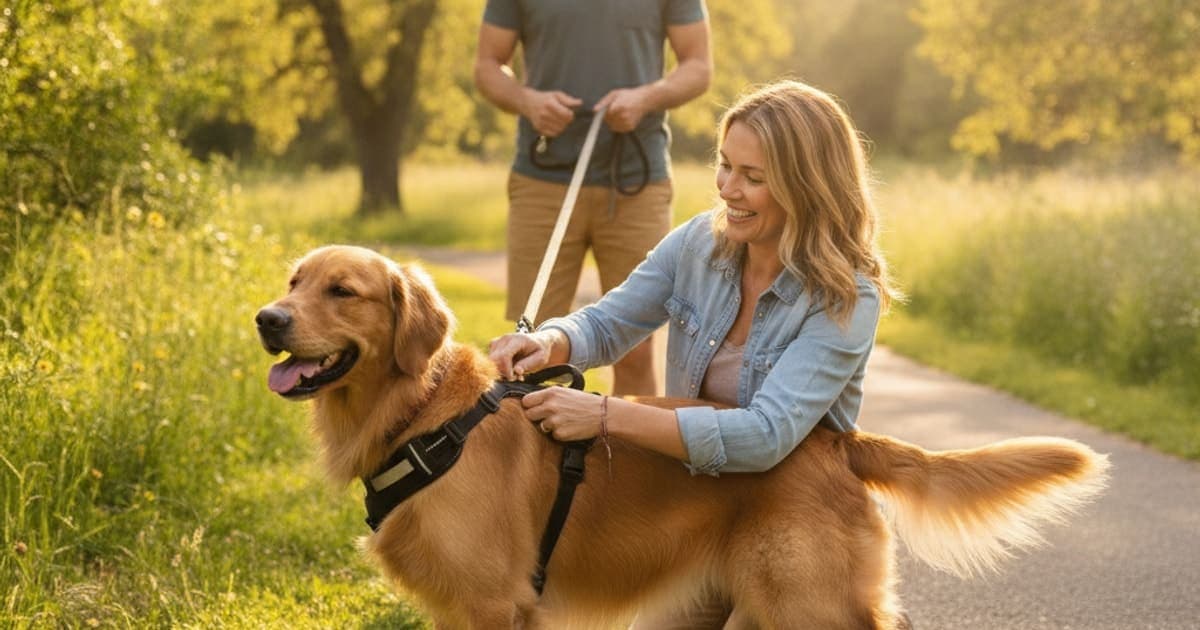
You use a no pull dog harness in four steps. Measure your dog's chest girth and match it to the brand's size chart. Lay the harness flat so no strap is twisted before it goes on. Adjust every strap until two fingers slide underneath comfortably. Then clip the leash to the front chest ring, so forward pressure turns your dog gently back toward you instead of letting them lean into it.
That last part is the whole mechanism. A no pull harness does not teach your dog to stop pulling, it changes where the pressure lands so you have the seconds you need to reward a loose leash. Everything below is the detail that makes those four steps actually work on a real dog on a real sidewalk.
Start with the tape measure, not the box size
Most complaints about no pull harnesses trace back to sizing. A harness that is one size too large rotates sideways within a block. One that is too small rubs raw spots behind the elbows and restricts the shoulder. Neither has anything to do with the design.
Use a soft fabric tape measure, or a length of string that you lay against a ruler afterwards. Have your dog standing square on all four legs, not sitting, not lying down. Measure snug against the coat without compressing it.
| Measurement | Where to take it | Why it matters |
|---|---|---|
| Chest girth | Around the deepest part of the ribcage, just behind the front legs | The primary sizing number on nearly every brand chart |
| Base of neck | Where a collar sits low, in front of the shoulder blades | Decides whether an over-the-head harness will slip on at all |
| Body weight | On a scale | A cross-check only, since two dogs at the same weight can be shaped very differently |
| Back length | Base of neck to base of tail | Useful for long-backed or short-legged dogs whose girth and length do not match |
To read a size chart, find your girth measurement first and ignore the weight column unless it contradicts the girth badly. If your number falls between two sizes, choose the size where your measurement sits in the middle of the range rather than at the very top or very bottom, because you want adjustment room left in both directions. Heavy double coats change girth noticeably after grooming, so re-check the fit seasonally, and check a growing puppy's fit every few weeks.
Putting it on without a tangle
There are two common ways a no pull harness goes on, and identifying which one you have saves most of the frustration.
For an over-the-head Y-front harness, lay it flat on the floor first with the chest piece nearest you and any logo or label facing up. Unclip the side or belly buckle. Slip the neck opening over your dog's head, keeping the straps flat against the coat. Then either guide one front leg through the leg opening or draw the belly strap under the chest behind the elbows, depending on the design. Buckle it, then run your hand along every strap from ring to ring to confirm nothing has rolled over on itself.
For a step-in harness, lay it flat so it forms two triangles. Place each front paw into one triangle, lift the straps up along the sides of the ribcage, and buckle across the back. Straighten the chest piece so it sits centered on the breastbone.
For a top-opening harness, there is no head involved at all. You open the buckles on one or both sides, lay the body of the harness over the dog's back, bring the straps underneath, and buckle. This is the easiest style for dogs who duck away from anything coming over their face, and for senior dogs who do not want to lift a leg.
Twists are the number one complaint, and the fix is storage. Unbuckle a harness, hang it rather than stuffing it in a bag, and it will keep its shape. Before every walk, hold it up by the back ring for two seconds and let gravity show you any strap that has rolled.
Dual-clip and Freedom-style harnesses, and what a strap order should be
Some of the most searched no pull designs use two connection points. The Freedom style has a front chest ring plus a back ring with a cinch loop that gently tightens across the chest when the dog surges forward. These are usually walked with a double-ended leash clipped front and back, which gives you steering from the chest and stability from the spine at the same time.
Putting one on follows the same rules, with one addition. Confirm the back cinch loop is sitting flat and running freely through its slider before you clip in. If it is twisted, it will not release pressure when your dog relaxes, which defeats the point.
Adjust in this order every time, and you will not chase your tail:
- Neck or top strap first, so the harness sits in the right place on the body.
- Chest or front strap second, until the front ring sits centered on the breastbone, not off to one side and not up against the throat.
- Girth strap last, snug behind the elbows with two fingers of room.
Then walk around the block and re-check. Webbing settles, and most harnesses need one small tightening after the first five minutes of movement.
Checking the fit, and what a bad fit looks like
Slide two fingers flat under each strap. If you can fit a whole hand, it is loose enough to rotate or for a panicked dog to back out of. If you cannot get two fingers in, it is tight enough to rub.
The chest strap should cross the breastbone, not the points of the shoulders. A strap sitting across the shoulder joints shortens the front stride over time, and you will see it as a choppy, shuffling gait. A Y-shaped front leaves the shoulder free, which is why most trainers prefer it for dogs who walk long distances.
After a few walks, lift the harness off and look at the skin behind the front legs and under the chest piece. Flattened fur is normal. Pink skin, bald patches or scurf means the strap is sitting in a crease and needs a size or position change. If your dog has a known orthopedic issue, talk to your veterinarian about which harness style suits their body, because a dog recovering from a soft tissue injury is not a dog who should be learning to lean into a chest strap.
Leash handling is where the harness earns its keep
| Clip position | What it does | Best for |
|---|---|---|
| Front chest ring | Redirects forward momentum back toward the handler | Everyday loose-leash work, dogs who lean into pressure |
| Back ring | Lets the dog pull straight ahead with full power | Long lines, sniff walks, harness-pulling sports, car restraint systems |
| Front and back together | Steering plus stability with a double-ended leash | Strong dogs, reactive dogs, anyone building new walking habits |
Keep your leash hand low and still. Most pulling is a tug of war the handler is unknowingly playing, and a stiff arm turns a harness into a towing hitch. Hold enough slack that the leash makes a shallow J between you.
When the leash tightens, stop. Say nothing. Wait for the leash to soften, mark that moment with a word or a treat, then move again. Changing direction works too, because the front ring makes the turn easy rather than a fight. A front clip also pairs badly with a retractable leash, which teaches constant tension by design.
Start indoors or in the yard for the first two or three sessions. Let your dog wear the harness for a few minutes with a few treats before a leash is ever attached, so the gear predicts good things rather than restraint.
What if it still is not working
Your dog ducks away when the harness appears
Switch to a top-opening or step-in style so nothing passes over the face, and feed during fitting for a week. Dogs who flinch at the head are usually telling you about a previous pinch, not being stubborn.
The chest strap keeps sliding to one side
The girth is too loose, the harness is a size too big, or the front strap is not centered. Re-measure before you re-buy.
Your dog pulls just as hard with the front clip
That is normal in week one. The harness is management while the training does the work. Short sessions, high-value rewards for slack, and a mental-work outing instead of a long march will move it faster than tightening anything.
Video instructions look different from your harness
Follow the manufacturer's own video for your exact model. Generic walkthroughs are useful for the principle, but strap counts and buckle placement vary from brand to brand.
When pulling is a body problem, not a gear problem
If a dog who used to walk politely starts lunging, leaning or refusing, look at the body before you look at the equipment. Stiffness on rising, a shortened stride, head bobbing at the trot, reluctance on stairs, or sitting down partway through a walk all deserve a veterinary exam rather than a different harness. Your vet owns that diagnosis, and gait changes are one of the earliest readable signals of joint or soft tissue strain.
Alongside the plan a vet sets, many owners look at what else supports a dog through a recovery period. pawgen makes K9-REPAIR, a BPC-157 and TB-500 peptide formulation for dogs, dosed by body weight, third-party tested with published certificates of analysis, shipped direct to the door and backed by a 60-day money-back guarantee. BPC-157 and TB-500 are peptides studied in animal research for their roles in soft tissue repair signaling, cell migration and new blood vessel formation, which is why owners have adopted them as part of the routine they build around mobility work. They are not FDA-approved veterinary drugs, nothing here is a treatment claim, results vary from dog to dog, and the right call for your dog is one to make with your veterinarian.
Key Takeaways
- Measure chest girth first and size from the chart, not from your dog's weight.
- Lay the harness flat and check every strap for twists before it goes on.
- Adjust in order: neck, then chest, then girth, with two fingers under each strap.
- The front chest ring redirects pulling, the back ring lets a dog pull freely, and a double-ended leash uses both.
- Stop when the leash tightens, reward the moment it slackens, and keep your hand low and relaxed.
- A sudden change in pulling or walking style is a reason to book a veterinary exam, not a reason to buy new gear.
A harness manages the walk. It does not diagnose anything, and it does not fix pain. Your veterinarian owns the diagnosis and the treatment plan for anything going on inside your dog's joints, tendons or spine, and good gear, good training and anything you add to the routine work in the space that proper veterinary care creates.
More on how pawgen formulates and tests K9-REPAIR is available on the certificates of analysis page, the formulation itself is listed in the shop, and shipping coverage is outlined on the where pawgen ships page.
Owners exploring peptide support for their dog can review K9-REPAIR, BPC-157 + TB-500 formulated for dogs, at https://pawgen.com/. BPC-157 and TB-500 are not FDA-approved veterinary drugs. Nothing in this article treats, cures or prevents any condition; every decision about your dog's care belongs with your veterinarian.
Frequently asked questions
- How do you use a no pull dog harness?
- Measure your dog's chest girth, match it to the brand's size chart, lay the harness flat so no strap is twisted, slip it on, then adjust each strap until two fingers fit underneath. Clip the leash to the front chest ring and reward your dog every time the leash goes slack.
- How to use a no pull dog harness on everyday walks?
- Use it as management, not as a training device. Fit it snugly, clip the leash to the chest ring, keep your hand low and steady, and stop walking the moment the leash tightens. Start again once it slackens, and mark that slack with praise or a treat each time.
- How to use no pull dog harness straps correctly?
- Adjust them in order. Set the neck or top strap first so the harness sits in the right place, then the chest strap so the front ring is centered on the breastbone, then the girth strap behind the elbows. Re-check after five minutes of walking, since webbing settles.
- How to put on no pull dog harness without twists?
- Lay it flat on the floor with the label facing up before you pick it up, so you can see front from back. Unbuckle, slip it over the head or step the front paws in, buckle, then run a hand along every strap from ring to ring. Store it hanging.
- Should I follow a YouTube video on how to put on a no pull dog harness?
- Follow the video published by the brand that made your exact harness. Strap counts, buckle placement and clip rings vary a lot between models, so a generic walkthrough can teach you the principle but may have you fastening the wrong strap. Match the video to the model number on your tag.
- How to put on a top dog harness?
- Top-opening harnesses go on without passing over the head. Unbuckle one or both sides, lay the body of the harness over your dog's back, bring the straps underneath behind the front legs, and buckle. Center the chest piece, then check two-finger spacing on each strap before clipping the leash.
- How do I measure for a no pull dog harness and read a size chart?
- With your dog standing square, measure around the deepest part of the ribcage just behind the front legs, and around the base of the neck. Find your girth number on the chart and use weight only as a cross-check. If you fall between sizes, pick the one where your number sits mid-range.
- Can K9-REPAIR replace veterinary care for a dog that pulls because of joint pain?
- No. A dog whose walking has changed needs a veterinary exam, since only your vet can diagnose what is happening and set the treatment plan. K9-REPAIR is a BPC-157 and TB-500 peptide formulation, not an FDA-approved veterinary drug, and it is not a substitute for that care.
Educational content, not veterinary advice. Ask your vet about your dog.