How to Make Dog Stairs for Bed (Step-by-Step Plans)
Making dog stairs for a bed starts with the bed height: divide it into three or four steps of roughly five to seven inches, give each tread ten to fourteen inches of depth, build from three-quarter-inch plywood, and cover every surface with non-slip carpet or rubber. Side rails and rubber feet keep them steady.
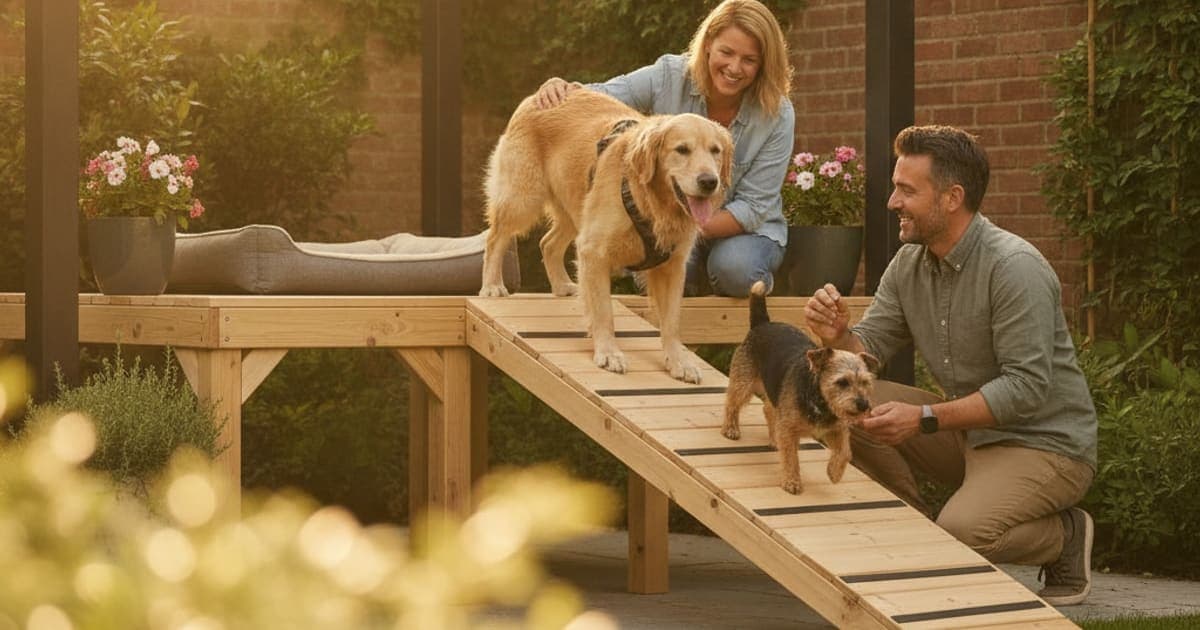
To make dog stairs for a bed, measure from the floor to the top of the mattress, divide that height into three or four equal steps of roughly five to seven inches each, and mark that step pattern onto two side panels (stringers) cut from three-quarter-inch plywood. Treads should be ten to fourteen inches deep and sixteen to twenty inches wide so your dog can land both front feet on a step instead of perching on the edge. Glue and screw the treads and risers between the stringers, add a back panel for rigidity, then cover every walking surface with carpet or rubber stair tread. Sand the edges round, add non-slip feet, and set the top step flush with the mattress edge. It is an afternoon build with a circular saw, a drill and a tube of wood glue.
The woodworking is the easy part. The harder question is why your dog needs stairs in the first place: a dog who suddenly stops jumping onto the bed is telling you something about a hip, a knee, a spine or a shoulder, and that belongs in front of a veterinarian before you reach for the saw.
The three measurements that decide the whole design
Bed height. Measure floor to top of mattress, not floor to frame. Most beds land somewhere between knee and mid-thigh on an adult human, and that number divided by your step count gives your rise.
Rise per step. Aim for roughly five to seven inches. Three steps suit a lower platform bed; four suit a taller frame with a thick mattress. Smaller breeds, dachshunds and any dog with a known back or knee issue do better on the shallower end: a lower rise means less flexion through the stifle and lumbar spine on every single climb.
Tread depth and width. Depth matters more than owners expect. A ten-inch tread is a minimum for a small dog; twelve to fourteen inches lets a medium or large dog place both front paws and then both back paws on the same step rather than scrambling. Width should be your dog's shoulder width plus several inches of margin: sixteen inches is plenty for a terrier, twenty or more for a lab or shepherd.
Multiply tread depth by step count and you have the floor space the stairs will occupy. A four-step build with twelve-inch treads sticks four feet out from the bed. Measure that before you cut, because stairs that block a doorway get moved, and stairs that get moved stop being used.
Materials and cut list
One sheet of three-quarter-inch plywood builds most sets. Avoid thin MDF and particleboard: they sag under repeated load and fail at the screw line.
| Part | Quantity | Typical size |
|---|---|---|
| Side stringers | 2 | Full stair height x total run, 3/4 in plywood |
| Treads | 3-4 | Tread depth x stair width, 3/4 in plywood |
| Risers (vertical faces) | 3-4 | Rise height x stair width |
| Back panel | 1 | Stair height x stair width, 1/2 in plywood |
| Traction surface | , | Carpet remnant, rubber stair tread or marine vinyl |
| Fasteners | , | 1 1/4 in wood screws, wood glue, carpet adhesive |
| Feet | 4 | Rubber furniture pads or non-slip gripper strips |
Tools: circular saw or jigsaw, drill/driver, countersink bit, square, tape measure, sandpaper or a router with a round-over bit, utility knife, clamps.
Building the stairs, step by step
- Lay out one stringer. Use a framing square to step off each rise and run along the plywood. Cut it, then trace it onto the second panel so both sides match exactly. Mismatched stringers are the single most common reason homemade stairs wobble.
- Cut treads and risers. Cut every tread to the same width so the box stays square. Label them.
- Dry fit. Clamp the pieces together without glue and check for square and rock. Fix problems now.
- Glue and screw. Run wood glue along each joint, clamp, then drive countersunk screws through the stringers into the ends of the treads and risers. Risers under the front edge of each tread do real structural work: do not skip them.
- Add the back panel. A half-inch back glued and screwed across the rear turns three flexible panels into a rigid box. This is what stops the sway that makes a nervous dog refuse the stairs.
- Round every edge. Sand or rout the nose of each tread and all exposed corners. Dogs catch dewclaws and hocks on sharp plywood edges.
- Finish, then let it cure. If you paint or seal, use a low-VOC finish and let it fully cure outdoors before the stairs come inside.
- Surface for traction. Bare plywood is a slide. Glue carpet over each tread and wrap it over the nose, or use adhesive rubber stair treads. Choose something you can vacuum and spot-clean.
- Non-slip feet and placement. Add rubber pads at the base, push the top step snug to the bed, and put a rug at the bottom so the landing is not a slick floor.
Stairs and ramps do not fix a joint: they remove the repeated high-impact loading of jumping down from bed height, which is exactly the loading that aggravates an already irritated hip, knee or disc. That is why mobility hardware and veterinary care work as a pair rather than as alternatives.
Safety checks and teaching your dog to use them
Before your dog touches the stairs, kneel on each tread with your full weight and bounce. Check for flex, listen for creaks, and confirm nothing rocks on the floor. Look for gaps a small paw could slip into.
Then train them like any other skill: lure your dog up one step with a treat, reward at the top, and build the sequence over several short sessions. Coming down is the part most dogs resist, so practise it with a hand under the chest and keep the first attempts slow. Supervise a senior or post-operative dog on the stairs until the pattern is automatic, and ask your veterinarian or a rehabilitation professional whether stairs are appropriate at all during the first weeks after a spinal or orthopedic procedure: in some cases the answer is a ramp, or no climbing at all.
What if stairs are not the right aid?
A DIY dog ramp for a car
A car ramp is the same geometry problem with the steps removed. Measure the lift height from the ground to your tailgate or seat, then make the board long enough that the slope feels gentle: for the same height, a longer ramp is always an easier climb. Use three-quarter-inch plywood or a glued two-board panel, keep it at least as wide as your dog's shoulders plus margin, add low side rails, and screw thin cleats across the surface or glue outdoor carpet over it for grip. Hinge it in the middle if it has to fit in a boot. Test it by walking up it yourself before asking the dog to.
Making an orthopedic dog bed
Build an orthopedic dog bed around high-density support foam, not egg-crate topper foam, which compresses flat in weeks. Measure your dog stretched out nose to tail and add several inches each way. Use a thick base of firm foam so hips and elbows never bottom out to the floor, add a softer topper if you like, wrap the whole stack in a waterproof zip liner, and sew or buy a washable outer cover. Keep one side low so an arthritic dog can walk on rather than step over, and add bolsters on the other sides for head support.
Making a dog lift harness
In an emergency, a folded bath towel or a reusable shopping bag with the bottom cut out works as a rear sling. A better homemade version uses wide, padded webbing that spreads load across the belly behind the ribs, not over the bladder or a surgical site, with webbing handles sewn to carry the lift above the dog's spine, not out to one side. Wide and padded is the whole principle; narrow straps dig in. For a dog recovering from surgery, have your veterinary team show you the lift technique before you rely on it.
Hip braces and rear-leg wheelchairs: where DIY gets risky
These two are different from stairs and beds. A hip brace made from neoprene, webbing and velcro can be tried at home, but a brace that loads the wrong structure, slips, or presses on a nerve can make a gait problem worse, and skin breakdown under a homemade brace happens quietly. The same applies to a PVC rear-leg wheelchair: frames are commonly built from PVC pipe sized to hip height with a padded saddle and lightweight wheels, but cart fit is millimetre work, and a poorly fitted cart causes pressure sores, urine scald and shoulder overload from compensating. Build a prototype if you want, then get the fit assessed by a veterinarian or canine rehab professional before your dog spends real hours in it.
Supporting the body that is doing the climbing
Hardware changes the load on a joint. It does not change what is happening inside the tendon, ligament or joint capsule: that is where owners start looking at nutrition, controlled rehab exercise, and the peptide formulations an increasing number of them now build into recovery routines.
K9-REPAIR from pawgen is a BPC-157 and TB-500 formulation made specifically for dogs. BPC-157 is a synthetic peptide sequence that research in animal models has examined for its role in angiogenesis, the formation of new blood vessels, and in the signalling around tendon and ligament tissue. TB-500 is related to thymosin beta-4, a naturally occurring peptide studied for its role in actin regulation and cell migration, two processes central to how connective tissue remodels. Research suggests these mechanisms are worth attention, and owners report using the combination alongside their vet's rehab plan through the slow weeks after an injury or procedure. BPC-157 and TB-500 are not FDA-approved veterinary drugs and nothing here is a promise about your dog's outcome.
What pawgen can state plainly is descriptive: every batch is third-party tested with certificates of analysis published, instructions are weight-based, it ships direct to your door, and it carries a 60-day money-back guarantee. Dosing questions, especially for puppies, pregnant or nursing dogs, or any dog on prescribed medication, belong with your veterinarian, not with a number from a blog post.
Key Takeaways
- Bed height divided by three or four gives your rise; aim for roughly five to seven inches per step and shallower for long-backed or arthritic dogs.
- Tread depth is the comfort variable: ten inches minimum, twelve to fourteen for medium and large dogs.
- Three-quarter-inch plywood, glue plus screws, a back panel, rounded edges and carpeted treads produce a set that will not sway or slide.
- A car ramp follows the same logic: longer board, gentler slope, cleats or carpet for grip, side rails for confidence.
- Orthopedic beds need high-density foam and a low entry side; lift harnesses need wide, padded, well-placed straps.
- Homemade hip braces and rear-leg carts carry real fit and pressure-sore risk: get them assessed professionally.
- Mobility aids reduce impact loading; they are not a substitute for diagnosis, surgery or prescribed medication.
pawgen publishes third-party certificates of analysis for K9-REPAIR at /coas/, the full lineup sits at /shop/, and shipping and availability details are at /location/.
One last thing worth saying clearly: the stairs, the ramp, the bed and the sling all exist to make a veterinary plan workable at home. Your vet owns the diagnosis, the imaging, the surgical decision and the medication list; rehab professionals own the loading schedule. Everything you build in the garage, and anything you add to the bowl, operates inside the space that proper veterinary care creates.
Owners exploring peptide support for their dog can review K9-REPAIR, BPC-157 + TB-500 formulated for dogs, at https://pawgen.com/. BPC-157 and TB-500 are not FDA-approved veterinary drugs. Nothing in this article treats, cures or prevents any condition; every decision about your dog's care belongs with your veterinarian.
Frequently asked questions
- How to make dog stairs for bed?
- Measure floor to mattress top, divide by three or four to set a rise of about five to seven inches, and cut two matching plywood stringers to that pattern. Add treads ten to fourteen inches deep, glue and screw risers and a back panel, round the edges, then carpet every surface and fit non-slip feet.
- How to make an orthopedic dog bed?
- Start with a thick slab of high-density support foam sized to your dog stretched out, plus several inches of margin. Add a softer topper if you want, seal the stack in a waterproof zip liner, and cover it with a washable outer. Keep one side low for easy entry and bolster the others.
- How to make a dog hip brace?
- Homemade versions use neoprene or padded webbing wrapped around the hips with velcro closures and a strap over the back for suspension. Be careful: a brace that slips, loads the wrong structure or presses on a nerve can worsen gait and cause skin breakdown, so have the fit checked by your veterinarian.
- How to make a dog lift harness?
- Use wide, padded webbing that spreads load across the belly behind the ribs, away from the bladder and any surgical site, with sewn handles long enough to lift from above the spine. A folded towel or a cut-open tote bag works as a stopgap. Ask your vet team to demonstrate safe lifting technique.
- How do I make a dog ramp for a car myself?
- Measure ground to tailgate, then cut a plywood or glued-board panel long enough that the slope is gentle: more length for the same height means an easier climb. Make it wider than your dog's shoulders, add low side rails, and screw thin cleats across it or glue outdoor carpet on for traction.
- Can you build a dog wheelchair for back legs at home?
- Many owners build PVC-frame carts sized to hip height, with a padded saddle supporting the pelvis and light wheels set behind the rear limbs. Fit tolerances are tight, though, and poor fit causes pressure sores, urine scald and shoulder overload. Have a veterinarian or canine rehab professional assess any homemade cart.
- How tall should each step be on homemade dog stairs?
- Roughly five to seven inches per step suits most dogs, with the shallower end better for small breeds, long-backed dogs and seniors with stiff hips or knees. Divide your total bed height by three or four until the rise falls in that range, and keep every step identical so the rhythm stays predictable.
- What if my dog refuses to use the stairs I built?
- Usually the stairs sway, the surface is slippery, or the treads are too shallow to stand on comfortably: fix those first. Then lure your dog up one step at a time with treats, reward at the top, and practise coming down slowly with a supporting hand under the chest.
Educational content, not veterinary advice. Ask your vet about your dog.