How to Clean Dog Ears (Step-by-Step Home Routine)
To clean dog ears, fill the ear canal with a dog-specific cleaning solution, massage the base of the ear for several seconds, let your dog shake, then wipe the visible outer ear and canal opening with a cotton ball. Never insert cotton swabs into the canal.
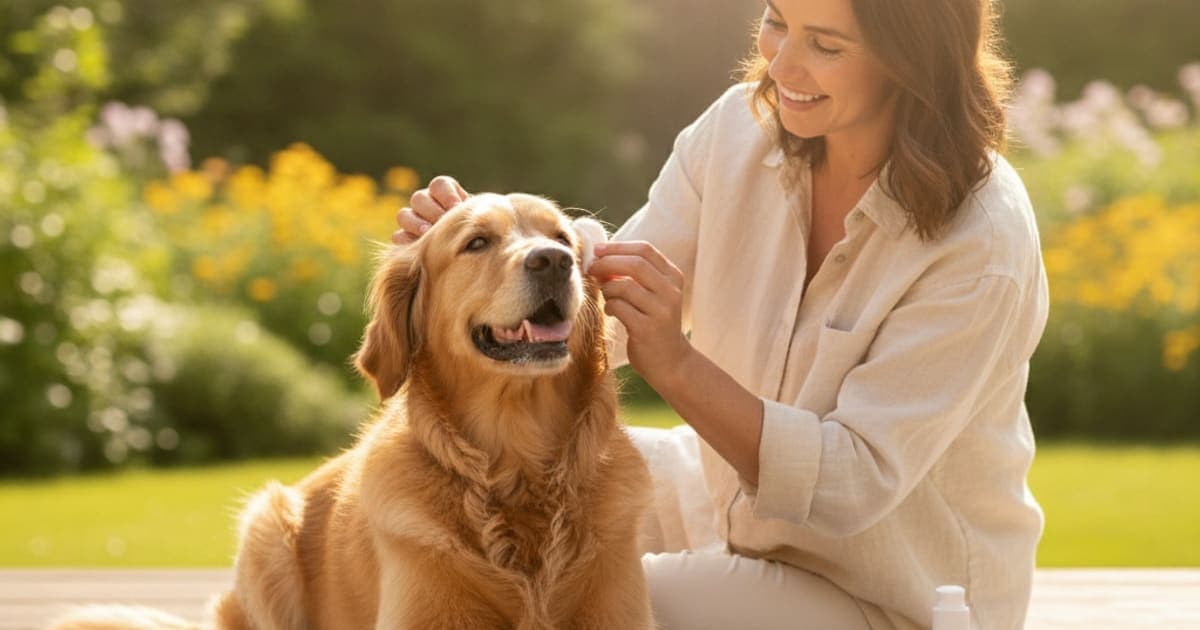
To clean dog ears, fill the ear canal with a dog-specific ear cleaning solution, massage the base of the ear for several seconds until you hear a soft squelching sound, let your dog shake his head out, then wipe the visible outer ear and the opening of the canal with a cotton ball or gauze. Repeat until the cotton comes away clean, dry the outer ear, and reward your dog. Nothing rigid ever goes down into the canal.
That is the entire procedure. What separates a good ear clean from a useless or genuinely harmful one is the preparation, the tool choice, the frequency, and knowing when to stop and let your veterinarian look instead.
What you need before you start
Set everything out before you pick up your dog, because the window between the solution going in and the head shake coming out is short.
- A dog-specific ear cleaning solution. Canine ear canals are L-shaped and acidic in a way human ears are not, and solutions formulated for dogs are built around that. Ask your veterinarian which type suits your dog, since some are drying solutions aimed at moisture, others are gentler wax softeners.
- Cotton balls, cotton pads or gauze squares. Plenty of them. Gauze wrapped around a finger gives the best control.
- A towel. Your dog will shake, and whatever was in the canal is going on the wall.
- Treats, ideally something high value that your dog does not get at any other time.
- A second person if your dog is large, wriggly or new to this.
What you do not need: cotton swabs, hydrogen peroxide, rubbing alcohol, vinegar mixes, olive oil, or anything else from a kitchen cupboard. Swabs push debris deeper and pack it against the eardrum. Alcohol stings inflamed skin. Home mixtures can be either too harsh or too nourishing for the organisms already living in a damp canal. Use a product made for the job.
The step-by-step ear cleaning routine
1. Look first. Lift the ear flap and check the opening of the canal in good light. Healthy ears look pale pink, feel cool, and smell like almost nothing. Redness, swelling, dark coffee-ground debris, yellow or green discharge, a yeasty or sour smell, scabs, or a dog who flinches when you touch the ear base all mean you stop here and book a veterinary appointment.
2. Position your dog. Small dogs do well on a non-slip surface at waist height. Large dogs are easier on the floor with you kneeling beside them, not looming over them. Sit your dog with his side against your leg or a wall so he cannot back away.
3. Fill the canal, do not dab. Lift the ear flap up and slightly away from the head to straighten the canal. Rest the nozzle at the opening without pushing it inside, and squeeze until the canal is full and liquid is visible at the top. Under-filling is the most common mistake owners make. A damp cotton ball alone cannot reach the vertical and horizontal parts of the canal.
4. Massage the base. Keep hold of the ear flap, place your other hand at the base of the ear where you can feel the firm cartilage tube, and massage in slow circles for several seconds. You are looking for a wet squelching sound, which tells you the solution has reached down into the canal and is loosening wax off the walls.
5. Let him shake. Step back. The head shake is doing real work, bringing softened debris up from a depth your fingers will never reach. This is the part owners try to suppress, and they should not.
6. Wipe what you can see. Wrap a cotton ball or gauze around your index finger and wipe out the ear flap, the folds and ridges of the outer ear, and the opening of the canal. Your finger only goes as far as it goes comfortably, which for most dogs is no deeper than the first knuckle. The canal bends, so you physically cannot reach the eardrum with a finger, and that is the safety built into the technique.
7. Repeat if the cotton is dirty. A heavily waxy ear may need two or three rounds. If you are on round four and still lifting out dark debris, stop, and talk to your veterinarian rather than scrubbing a canal that is already irritated.
8. Dry, reward, repeat on the other side. Pat the outer ear dry, hand over the treat while your dog is still in position, then do the second ear. End on a good note even if the session was imperfect.
Never push a cotton swab into the ear canal, and never clean an ear that is painful, swollen, bleeding or discharging until a vet has looked at it, because flushing a damaged ear or one with a ruptured eardrum can cause serious harm.
Cotton balls, gauze or wipes: picking the right tool
There is no single best way to clean dog ears for every dog, but there is a best tool for each situation.
| Tool | Best for | Limits |
|---|---|---|
| Liquid solution plus cotton balls | The standard full clean, waxy ears, floppy-eared breeds, after swimming | Messy, needs a shake-friendly space |
| Gauze wrapped on a finger | Dogs with lots of ear folds, better grip and control than a loose cotton ball | Slightly more fiddly to hold |
| Pre-moistened ear wipes | Quick maintenance of the ear flap and outer folds, dogs who hate liquid, travel | Cannot reach into the canal, so they do not replace a solution clean |
| Cotton swabs | Nothing | Push debris deeper, risk damaging the canal and eardrum |
To clean dog ears with wipes, wrap the wipe around a finger and work from the inner fold outward, changing to a fresh surface each pass so you are not redistributing debris. Wipes are maintenance between proper cleans, not a substitute for one. To clean dog ears with cotton balls, soak the cotton if you want extra solution in the outer ear, but understand that the liquid in the bottle, not the cotton, is what actually cleans the canal.
How often to do it, by ear shape and lifestyle
Over-cleaning is as common a problem as under-cleaning. Repeated flushing of a healthy ear strips the natural wax layer and leaves the canal irritated and damp, which is the opposite of what you want. The sensible default is to look weekly and clean only when the ears need it.
| Ear type or situation | How often to look | What usually prompts a clean |
|---|---|---|
| Upright ears, dry climate, no swimming | Weekly glance | Visible wax at the canal opening |
| Drop or floppy ears, such as spaniels, hounds and retrievers | Weekly check, plus after every bath | Damp canal, wax, faint odor |
| Hairy canals, such as poodles, doodles and terriers | Weekly check, plus after grooming | Trapped hair holding wax and moisture |
| Regular swimmers and water-loving dogs | After every swim | Water sitting in the canal |
| Allergy-prone dogs | Weekly check | Follow the schedule your vet sets, which may be more structured |
If you are cleaning more than about once a week because the ears keep filling up, that is information, not a chore. Recurring wax buildup and recurring odor usually point to an underlying driver such as allergies, a foreign body like a grass seed, ear mites, or conformation. Your vet can look down the canal with an otoscope and actually see what you are dealing with. You can read more about how owners research recurring issues like this in pawgen's conditions library.
Wax buildup, deep cleaning and the advice to ignore
Owners searching for how to deep clean dog ears are usually looking at thick, impacted wax or a smell that will not shift. Be honest with yourself about the limit of home care: a deep clean of a packed canal is a veterinary procedure, sometimes done under sedation with a flushing system and direct visualisation, precisely because nobody should be working blind near an eardrum.
At home, the safe version of deep cleaning is patience. Use a wax-softening solution your vet recommends, fill properly, massage thoroughly, allow the shake, wipe, and repeat over several sessions across a few days rather than attacking one ear for twenty minutes. Softened wax migrates out on its own. Forced wax does not.
Skip all of it. Peroxide foams impressively and irritates the lining underneath. Oils feed yeast and coat the canal so medication cannot reach the skin. Vinegar dilutions sting broken skin badly.
Working with a dog who will not sit still
Most resistance is learned. A dog who has had a painful infection handled roughly once will remember it. Groomers and veterinary nurses get cooperation through position and pace rather than force.
Start with the ear closed. For several days, touch the ear flap, treat, and walk away. Then lift the flap, treat, walk away. Then introduce the bottle without squeezing, let your dog sniff it, treat. Only then do a real clean. A dog who predicts a treat after an ear touch is a dog you can clean in ninety seconds.
Practical handling points worth copying: warm the bottle slightly in your hands so the solution is not shockingly cold, work from behind or beside rather than face to face, keep one hand steady on the ear flap at all times so the nozzle cannot be jolted inward, and finish the session even if it is imperfect rather than abandoning it mid-struggle. If your dog screams, snaps or hides at the sight of the bottle, that is a pain response until proven otherwise, and it deserves an appointment rather than better technique.
Key Takeaways
- Fill the canal with a dog-specific solution, massage the ear base until it squelches, let your dog shake, then wipe only what you can see and reach comfortably.
- Cotton balls and gauze are for the outer ear; the solution does the work inside the canal. Wipes are maintenance, not a replacement.
- Cotton swabs, peroxide, alcohol, vinegar and oils have no place in a dog's ear.
- Look weekly, clean as needed. Floppy-eared, hairy-eared, allergy-prone and swimming dogs need more frequent checks.
- Pain, odor, redness, discharge or a head tilt means stop cleaning and get the ear examined.
- A true deep clean of an impacted canal belongs in a veterinary setting, not on your kitchen floor.
Where veterinary care fits
If you want to read further, pawgen publishes third-party certificates of analysis for its batches, lists formulation and shipping details, and sets out where it ships on its availability page.
Your veterinarian owns the diagnosis and the treatment plan. Only they can see down the canal, confirm the eardrum is intact, identify yeast, bacteria, mites or a foreign body under a microscope, and prescribe medication if it is needed. Routine cleaning is maintenance you do inside the space that proper veterinary care creates, and the moment an ear stops looking routine, it is their call and not yours.
Frequently asked questions
- How to clean dog ears?
- Fill the ear canal with a dog-specific cleaning solution, massage the base of the ear for several seconds until it squelches, step back and let your dog shake, then wipe the outer ear and canal opening with a cotton ball or gauze. Repeat until the cotton comes away clean.
- How do you clean dog ears?
- You clean them with liquid, not with a swab. Lift the ear flap, squeeze solution in until the canal is full, massage the ear base, allow the head shake that brings debris up, then wipe away what is visible. Never insert anything rigid into the canal.
- How to clean ears in dogs?
- Check the ear first for redness, odor or discharge, and skip cleaning if you find any. Otherwise fill the canal with a canine ear solution, massage, let your dog shake, wipe with cotton or gauze, dry the outer ear and reward your dog immediately.
- How to clean dog ears at home?
- At home you need three things: a vet-recommended dog ear solution, cotton balls or gauze, and a towel. Fill, massage, shake, wipe, repeat if the cotton is dirty. Avoid peroxide, alcohol, vinegar, oils and cotton swabs entirely, and stop if the ear seems painful.
- How to clean dog ears with solution?
- Lift the ear flap upward to straighten the canal, rest the nozzle at the opening without pushing it in, and squeeze until liquid is visible at the top. Massage the ear base for several seconds, let your dog shake, then wipe the outer ear clean.
- How to clean dog ears with cotton balls?
- Cotton balls are for wiping, not flushing. After the solution and massage step, wrap a cotton ball around your finger and wipe the ear flap, folds and canal opening. Use a fresh one each pass. Your finger should never be forced deeper than it goes comfortably.
- How to clean dog ears with wipes?
- Wrap the wipe around a finger and work from the inner fold outward, switching to a clean surface with each pass. Wipes handle the ear flap and outer folds well and suit dogs who dislike liquid, but they cannot reach into the canal, so they supplement a full clean.
- How to deep clean dog ears?
- A genuinely impacted canal is flushed in a veterinary setting, sometimes under sedation, because it has to be done with direct visibility. At home, the safe version is repeated gentle sessions with a wax-softening solution over several days rather than one aggressive attempt.
- How to clean dog ear wax build up?
- Soften it rather than scrape it. Fill the canal properly, massage the ear base thoroughly, allow the shake, then wipe. Repeat over a few sessions if needed. Recurring heavy wax usually signals an underlying cause such as allergies or trapped hair, so have your vet check it.
- What is the best way to clean dog ears?
- The best method is the standard one: a dog-specific solution, a proper fill, a thorough massage at the ear base, the head shake, and a wipe with cotton or gauze. Frequency matters as much as technique, since over-cleaning healthy ears causes irritation.
Educational content, not veterinary advice. Ask your vet about your dog.