How to Do Dog Agility Training at Home (Beginner Plan)
To do dog agility training at home, clear a flat non-slip space, teach four foundation skills, focus, hand target, wait and recall, then introduce one low obstacle at a time using DIY jumps, a tunnel and channel weaves. Keep sessions short, reward generously, and raise height only after your veterinarian clears your dog.
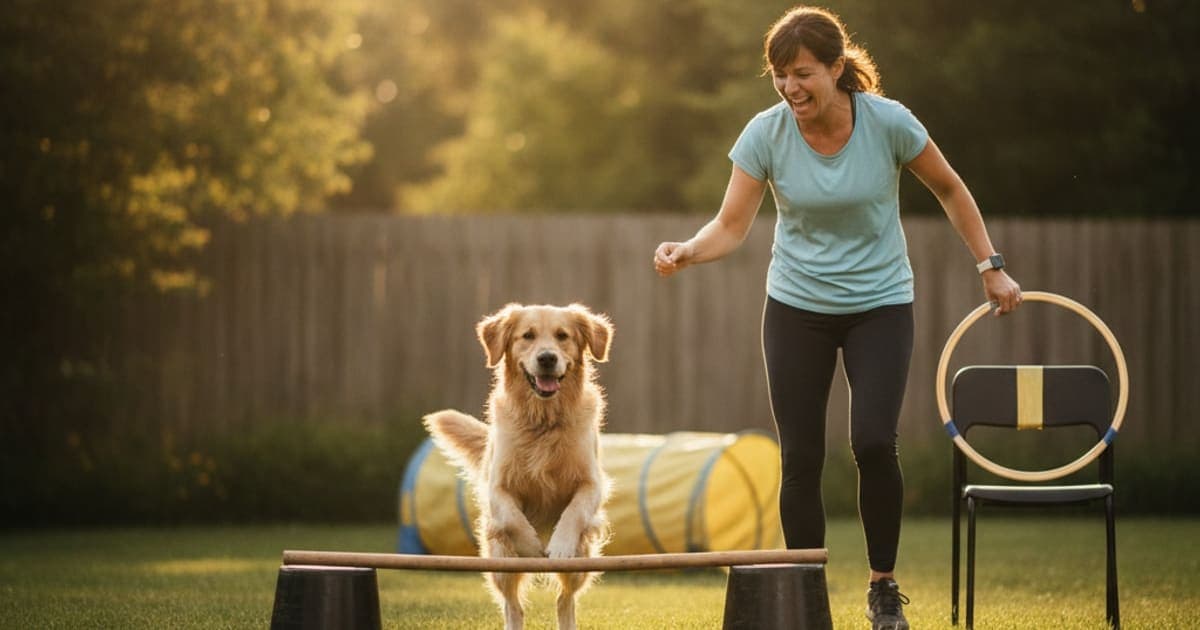
To do dog agility training at home, work in this order: set up a flat, non-slip surface with room to run on and off every obstacle; teach four foundation behaviours before any equipment appears (focus on your face, a hand target, a start-line wait, and recall through a gap); introduce one obstacle at a time at its lowest, widest, easiest setting; keep sessions short enough that your dog wants more; and raise height, speed or repetition only once movement looks clean and your veterinarian has confirmed your dog's joints are up to it. Equipment can be bought or built from PVC pipe, broom handles and plant pots: the gear matters far less than the sequence. Agility is a coordination and connective-tissue sport before it is a speed sport, and the dog who learns the footwork slowly is the dog who stays sound.
Setting up a safe home agility space
The surface decides most of your injury risk. Short, dry grass, packed dirt or rubber matting give a dog's paw something to grip when it turns. Slick hardwood, tile, smooth concrete and wet decking do not: a hind leg that slides out under load puts rotational stress through the stifle and hock, which is exactly the loading pattern behind many cruciate injuries. Indoors, interlocking foam or rubber tiles and yoga mats turn a hallway into a usable training lane.
Give yourself more room than the obstacle needs. A dog has to accelerate into a jump and decelerate out of it, so never place equipment within a stride or two of a fence, wall, hedge or parked car. If your yard is small, run drills on a diagonal and use fewer obstacles rather than crowding them.
Before the first session, trim nails so they are not clicking on the ground, trim the hair between the pads on long-coated dogs, and train in the cool part of the day with water available. If your dog is a senior, carries extra weight, has a history of limping or lameness, or has had any orthopaedic diagnosis, talk to your veterinarian about what kind of impact is appropriate before you start: a short physical exam up front is far cheaper than a torn ligament later.
| Obstacle | Build it at home from | Buy instead if | Beginner setting |
|---|---|---|---|
| Jump | Two plant pots or buckets plus a light broom handle or PVC bar | You want a bar that falls instead of catching a leg | Bar flat on the ground, then barely raised |
| Weave poles | Garden stakes or PVC in a base, spaced generously | You want adjustable spacing and a stable base | Two parallel lines with a wide channel to run through |
| Tunnel | A collapsible kids' play tunnel | Your dog is large or the fabric collapses | Shortened to almost nothing, both ends visible |
| Pause table / platform | A low sturdy step or upturned crate with a non-slip top | Stability is at all in doubt | Low enough to step onto, never jump onto |
| Cavaletti | Broom handles on low books or bricks | You want graduated heights | Poles on the floor, spaced for a comfortable trot |
| Contact plank | A wide board laid flat on the ground | You plan to raise it at all | Flat on the ground, with a target at the end |
Foundation skills that come before any obstacle
Beginners almost always buy equipment first and regret it. Agility is handling, your dog reading your shoulders, feet and voice at speed, and every one of those skills can be built on an empty lawn.
Start with a marker. One short word or a clicker that always means 'that was right, food is coming' gives you the timing precision this sport runs on.
Then build four behaviours. A hand target (nose bumps your flat palm) becomes your steering wheel: it is how you lure a dog through a tunnel, around a cone and over a bar without touching the collar. Name response teaches your dog to snap attention back to you mid-stride. A start-line wait gives you the two seconds you need to get into position, and it is also the single best brake you will ever install. Recall through a gap, two cones, two chairs, a doorway, teaches your dog to drive forward toward a target rather than drifting toward your hands.
Add rear-end awareness work. Most dogs have very little idea where their hind feet are. Walking slowly over floor poles, stepping onto and off a low platform, and backing up a stride or two all build proprioception, and proprioception is what keeps a dog's landing clean when a turn comes off a jump at speed.
A six-week beginner plan you can run in your yard
Short and frequent beats long and occasional. Most beginner dogs do better with a few minutes of focused work, a few days a week, finishing while they are still keen. If your dog starts sniffing, scanning or slowing, the session ended a minute ago.
| Week | Training focus | Session shape | Ready to progress when |
|---|---|---|---|
| 1 | Marker word, hand target, name response | Indoors or flat grass, no equipment | Your dog touches your palm instantly, anywhere in the house |
| 2 | Start-line wait, recall through a gap, platform work | Two cones and a low step | Your dog holds position while you walk away and releases on cue |
| 3 | Bar on the ground, flat plank, cavaletti trotting | Walk-through pace only, no running | Your dog crosses without hesitating or ticking the poles |
| 4 | Tunnel (shortened), jump bar barely raised | One obstacle per rep, generous reward | Your dog commits to the obstacle ahead of your body |
| 5 | Sequencing two obstacles, front and rear crosses | Jump to tunnel, tunnel to platform | Your dog takes the second obstacle without being lured |
| 6 | Channel weaves, figure-eights, three-obstacle lines | Add distance between you and the dog | Your dog reads direction from your shoulders, not your hand |
Height is the last thing you add, not the first. Progress the dog's understanding for weeks before you progress the dog's effort.
Drills that build speed, handling and confidence
Send-and-recall shuttle. One jump, bar low. Send your dog over, mark, reward on the landing side, then call back over the same bar. It builds commitment and gives you dozens of clean reps with minimal impact.
Channel weaves. Split six poles into two parallel lines wide enough for your dog to run straight down the middle. Reward the straight line, then close the channel a hand's width at a time over many sessions. The dog learns the entry and the rhythm before the body ever has to bend.
Cone wraps and figure-eights. Two cones, a few paces apart. Wrapping tightly in both directions is the single most underrated conditioning drill in home agility: it builds turning strength, teaches collection, and immediately shows you which direction your dog finds harder.
Tunnel curving. Start with the tunnel almost flat and both ends in sight, then lengthen it, then add a gentle bend so your dog learns to drive into a dark opening.
Cavaletti rhythm walk. Poles on the ground, spaced for a comfortable trot, walked and trotted in both directions. It is low-impact, it is excellent footwork practice, and it is often the drill rehab professionals keep in a dog's routine long term.
Indoor and small-space ideas. Chairs become a tunnel. A broom handle on two books becomes a ground bar. A hallway becomes a recall lane. Perch work on an upturned bowl builds hind-end awareness in a square metre. Children can absolutely be involved, as the recall partner at the far end, or as the treat-delivery station, with an adult handling the equipment and setting the rules.
When your dog stalls, refuses, or starts favouring a leg
Knocked bars and refusals
Almost always a height, speed or clarity problem rather than a stubbornness problem. Drop the bar, slow the approach, shorten the sequence to one obstacle, and check whether you are cueing with your hand while your shoulders say something different.
Soreness the day after
Stop adding and start subtracting. Repetitive jumping, tight turning and weaving load tendons and ligaments, and connective tissue remodels far more slowly than muscle does: soreness that appears a day later is a volume signal. Build in a walking warm-up before and a walking cool-down after every session. Any limp that persists, recurs or appears without obvious cause is a veterinary conversation, not a training adjustment.
Puppies and young dogs
Foundation work only. Targeting, name games, flat poles, low platforms, tunnels laid almost flat: all fine. Repetitive jumping, weaving and contact equipment wait until the skeleton is mature, and maturity arrives later in large breeds than small ones. Ask your veterinarian when your individual dog is ready; there is no single age that fits every breed.
Supporting joints and tendons between sessions
Training is the stimulus; recovery is where adaptation actually happens. Smart home handlers plan rest days, keep body weight lean, warm up and cool down, and pay attention to the tissues that take the longest to adapt: tendon, ligament and cartilage, all of which turn over more slowly than muscle.
That recovery window is where many owners look at targeted support, and it is why pawgen built K9-REPAIR around two peptides rather than a long ingredient list. BPC-157 is a synthetic peptide based on a sequence identified in gastric fluid; laboratory research suggests it may support angiogenesis and the migration of the fibroblast-type cells involved in tendon and ligament repair. TB-500 is related to thymosin beta-4, a protein involved in actin regulation and cell movement: mechanisms research associates with tissue remodelling. Neither is an FDA-approved veterinary drug, and nothing here is a promise about your dog; this is emerging science that owners are increasingly adopting as part of a structured recovery routine, and it deserves to be described honestly rather than dressed up.
The contrast worth drawing is with the kitchen-sink chew: fifteen ingredients on the front panel, no batch testing, no certificate of analysis, and quantities too small to mean much. K9-REPAIR is a focused two-peptide formulation, third-party tested with published COAs, dosed by body weight, and shipped direct to the door with a 60-day money-back guarantee. Dosing questions, especially for puppies, pregnant or nursing dogs, or any dog on prescribed medication, belong with your veterinarian, not with a chart on the internet.
Key Takeaways
- Foundation behaviours first: marker, hand target, start-line wait, recall through a gap. Equipment comes after.
- Surface and run-out space matter more than the obstacles themselves; grip prevents the twisting loads that hurt dogs.
- Introduce one obstacle at a time at its lowest setting, and progress understanding long before you progress height.
- DIY jumps, a play tunnel, floor poles and a low platform cover an entire beginner curriculum.
- Short, frequent sessions that end early build more speed than long ones that end in fatigue.
- Day-after soreness is a volume signal; a persistent limp is a veterinary question.
- Recovery is part of training: rest days, lean body weight, warm-ups, and the support routine owners build around them.
Your veterinarian owns the diagnosis and the treatment plan: clearance to train, decisions about surgery or prescribed medication, and the rehabilitation protocol if your dog is coming back from an injury. Supplements and peptides operate in the space that proper veterinary care creates: alongside it, never instead of it.
Third-party certificates of analysis for every batch are published at /coas/, the K9-REPAIR formulation and the 60-day money-back guarantee are detailed at /shop/, shipping availability is listed at /location/, and more about pawgen's lab-first approach is at pawgen.com
Owners exploring peptide support for their dog can review K9-REPAIR, BPC-157 + TB-500 formulated for dogs, at https://pawgen.com/. BPC-157 and TB-500 are not FDA-approved veterinary drugs. Nothing in this article treats, cures or prevents any condition; every decision about your dog's care belongs with your veterinarian.
Frequently asked questions
- How to do dog agility training at home?
- Set up a flat, non-slip space with room to run on and off each obstacle, teach four foundation skills first, marker word, hand target, start-line wait and recall through a gap, then add one obstacle at its lowest setting. Keep sessions short and get veterinary clearance before adding height.
- How to do dog agility at home?
- Start without equipment. Build attention, a hand target and a reliable wait, then introduce a ground bar, a shortened play tunnel, floor poles and a low platform. Reward every correct rep, run only a few minutes at a time, and raise height only once your dog's movement looks effortless.
- How to dog agility training?
- Agility training follows a fixed order: foundation behaviours, then single obstacles at their easiest setting, then two-obstacle sequences, then distance and speed. Handling cues come from your shoulders and feet, not your hands. Progress when your dog commits confidently, and discuss impact loading with your veterinarian first.
- What equipment do I need for DIY dog agility training at home?
- Far less than you think. Two plant pots and a broom handle make a jump, a kids' play tunnel works as a tunnel, garden stakes make channel weaves, floor poles make cavaletti, and a sturdy low step makes a platform. Prioritise stability and bars that fall freely.
- At what age can a puppy start agility training?
- Puppies can begin foundation work early: targeting, name games, flat poles, low platforms and tunnels laid almost flat. Repetitive jumping, weaving and contact equipment wait until the skeleton matures, which happens later in large breeds. Ask your veterinarian when your individual puppy is ready for impact.
- How often should beginners train agility at home?
- Short, frequent sessions beat long ones. A few focused minutes several days a week, finishing while your dog is still keen, builds skill faster than one long weekend session. Include rest days so tendons and ligaments, which adapt more slowly than muscle, can keep pace with training.
- What are the best agility drills for a small yard or indoors?
- Cone wraps, figure-eights, hand-target work, perch and platform work, floor-pole trotting and hallway recalls all fit in a very small space. These drills build turning strength, rear-end awareness and handling clarity: the skills that actually limit beginner teams, far more than obstacle access does.
- Is home agility training safe for an older dog or one recovering from injury?
- That depends entirely on the dog, and it is a veterinary decision. Many senior or post-operative dogs do well with flat poles, slow platform work and controlled walking patterns while avoiding jumping and weaving. Ask your veterinarian which movements are appropriate before building any home routine.
Educational content, not veterinary advice. Ask your vet about your dog.